Monthly Archives: January 2010

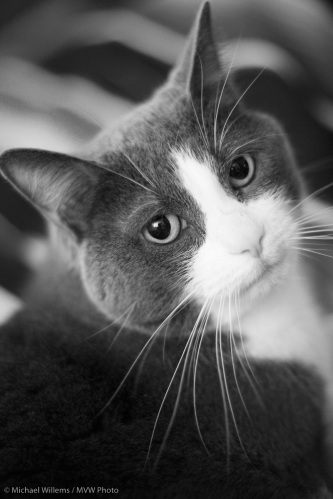
Moi, aujourd’hui.

Even in a snapshot, you want to;

  1. Avoid direct light (use reflected light instead).
  2. Use an off-centre composition (follow “the rule of thirds”).
  3. Blur the background, if the picture is a portrait.
  4. Straighten horizontal/vertical lines.
  5. Fill the frame.

If you do all that, your pictures will be better than Uncle Fred’s.

1D MkIV

As a shooter, and as a teacher,and as a tech blogger, I need the most recent equipment. So I have no obtained a Canon 1D MkIV to replace my 1D MkIII.

So far it seems fine. Not the same great focus system as the 7D, but th same solid feel as the 1D MKIII and the same software options, which Canon has left off the 7D (e.g. the option to name the files to your liking). And lowernoise than the 7D (of course, if only because it is a 1.3 crop factor sensor). Fast 10 fps shooting that lasts much longer than on the 1D MkIII. Sozen of full RAW shots before the buffer fill sup even with a slow memory card.

So far. so good. You can be sure I will post detailed information, rather than these very first impressions, in the next days.

Creative Bokeh

Bokeh means the blur, or the quality of the blur, in parts of your image that are out of focus.

And you can use this to effect. For instance when shooting city lights, or Christmas tree lights, you can make them into circles by throwing them out of focus:

That was shot with a Digital Rebel with a 50mm f/1.8 lens. You cannot get simpler than that!

Metering

A few words on light meters.

When shooting studio shots like the ones I talked about, you use a flash meter. When doing that to accurately judge the right exposure, keep this in mind:

  • Have a spare battery at hand
  • Move the dome out. Do not leave it screwed in.
  • Use the meter in Flash-metering mode!
  • Only flash one flash at a time. Turn off other flashes when you meter one.
  • Start with your key light; then one by one meter the other flashes. These will be darker generally.
  • Ensure your meter is set to the right ISO.

Then use the measured aperture as your starting point and check the histograms on your camera for fine adjustments. I believe that “exposing to the right” is generally a good idea.

Also, don’t forget to use a grey card to get a nice white balance reference target.

Houston:

We appear to have an issue: clicking through to blog post links gets you to an empty page. Problem at WordPress.com I presume – if so, it’s one I hope they will fix soon!

A standard portrait setup

Back to the standard “small studio” setup I described earlier. This time I shall talk a bit not about how it works – I assume light sensitive slave cells and Pocketwizards and cables are all old hat to you now – but instead, I will talk about how to use it.

As a reminder, here is such a four-light setup, again:

Four lights; and after the click, more about how you use them.

Continue reading

Try this fun technique

Have some fun with your photography.

  • Set your SLR to S/Tv mode
  • Select a shutter speed of 1/10th second.
  • Use minus one stop exposure compensation
  • Use a zoom lens
  • Use flash
  • Now get ready. Prefocus on your subject with your lens mid-range (eg on an 18-55mm lens, set to 35mm).
  • Zoom to telephoto, and then rapidly zoom out all the way. In the middle of this zooming action, click.

This is trial and error, but you will succeed in the end, with shots like this one, fo a student who recently kindly volunteered:

The flash “freezes” the subject, but your background shows the zooming effect.

That portable studio

So when I pack by bags to do a location shoot, like today’s executive headshots shoot, you saw in a recent post that I bring rather a lot.

And what do I use? How does it look when it’s all set up?

That setup process, which takes about 45-60 minutes including carrying it all from the car in stages, results in this:

This setup consists of:

  1. A grey backdrop. I like grey because you can make it any colour, from black to white.
  2. The main (“key”) light: a light stand with Bowens 400 Ws monolight in a softbox. This is fired by a Pocketwizard (just visible, top left)
  3. The fill light: a light stand with a Bowens 400 Ws monolight into an umbrella. This is fired by the slave cell.
  4. The background light: a mini  light stand with a 430EX Speedlite, with a  Honl speed strap and a Honl 1/2 CTB gel. This light is fired by a Pocketwizard, using a Flashzebra cable.
  5. The hair light: another a light stand with a 430EX Speedlite, with a  Honl speed strap and Honl snoot. This light is fired by a Pocketwizard, using a Flashzebra cable.
  6. A stool.
  7. The camera set to 1/100th sec, f/9, 100 ISO, and equipped with a PocketWizard to fire the other flashes.

It doesn’t look like all that much, but when you write it out, and then add the power cables, connection cables, bags, and so on, it’s quite a lot.

That look over the shoulder

One common sexy model look is the “look over the shoulder”.

Like here, in this shot of Nemo, a somewhat Rubenesque but nevertheless pretty model:

In an “over the shoulder” pose women can look over either shoulder, but for men, if the shoulders are angled, avoid them looking over the higher shoulder. This is a feminine look.

As so often with available light portraits, in the shot above I used my Canon 7D with:

  • a 50mm lens, which on the 7D crop camera is really equivalent to 80mm
  • 2000 ISO (on auto ISO)
  • 1/60th at f/1.4

Yes, you can take pictures on a 7D at 2000 ISO and have them look just fine.

Bright pixels are sharp pixels, but also, bright pixels are noise-free pixels.

(And you know to focus accurately, using one focus point, aimed at the closest eye, right?)

Why photography costs money

Mainly because it breaks the photographer’s back.

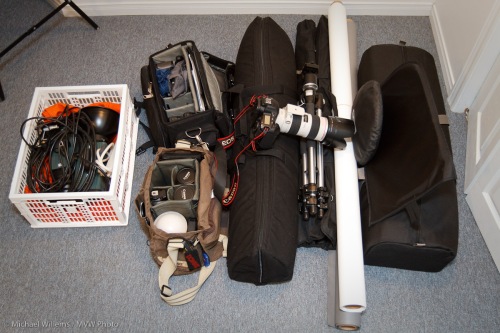
Here is part of what I am bringing to a multiple corporate headshots session tomorrow:

This kit consists of:

  • One backdrop
  • Two rolls of backdrop paper, grey and white
  • One two-monolight set with three stands and two umbrellas
  • Two more monolights
  • Four lightstands with umbrellas for speedlites
  • Camera kit (lenses, a Canon 1Ds MkIII, etc)
  • Lighting kit with four speedlites, five Pocketwizards, modifiers, and much more.
  • Tripod

Not pictured:

  • a 60×80 softbox
  • a Canon 7D camera
  • a muslin backdrop
  • a stool for the subject to sit on.

I am now going to bed early, so that I can build strength!

The serious point, of course, is that when a photographer visits with a portable setup, he really carries with him a full studio and everything that includes.

RIP Ian Fuller

Word has reached me that Ian Fuller, a.k.a. frequent contributor “bkkphotographer” from Bangkok, has unexpectedly died. His wife confirms this from his email address, as do several friends.

This leaves me profoundly sad, and I wish his family and his other friends strength, and extend my condolences. Ian was a good man, and was just 53. As so often, it is entirely the wrong people who die too young.

I had wondered why he had gone radio silent: I had thought perhaps he was taking a vacation. Alas, the news was much, much sadder than that.

Soon, the book

The book is progressing well. The only thing that is slowing down is all this work!

But it is delightful work. Last weekend, birthday shoots. This week, spot news. Thursday to Sunday: teaching. Tomorrow, a series of on-location executive portraits. Great and varied work.

On a forum recently, I asked some other pros what they would use in a given lighting situation. One of them wrote back: “You do this for a living so you shouldn’t have to ask. Do you want your clients to google you and find that you are asking questions”?

This person misunderstands the Internet and misunderstands the collaborative world we live in today.  Of course I ask, share, debate, weight: the moment you think you know it all, you stop developing.

So if you have questions here, please ask and let’s kick some ideas around. Whether you are just starting to develop as a photographer or whether you are a pro: never be afraid to ask.

Fun with gels

Tonight, I had some fun trying various new gels.

For those of you new to photography: a gel is a coloured material that you put in front of a flash to change the coour. You typically use these for background colours.

Usually I use a slight correction gel (1/2 CTO, 1/4 CTB, etc) to perhaps warm a background up a bit or to give a corporate shot that slight blue tint in the background. But tonight I thought I’d play with some great new colours.

My system for the test shots below was:

  • A key light to camera left, in a softbox on a Bowens 400 Ws monolight
  • A fill light to camera left, into an umbrella, using an Opus 250 Ws monolight
  • A Hair light, also into an Opus light, and snooted
  • A background light: a Canon 430 X flash with the various gels. I used the excellent Honl system: the speedstrap on the flash, plus gels conveniently Velcro’d on.

So for these gels I used some basic colours and the new Honl “Autumn” and “Hollywood” gel sets. Great colours. Here we go, and look how each gives you a very different shot:

[1] The new “Autumn” kit:

Egg Yolk Yellow:

Chocolate:
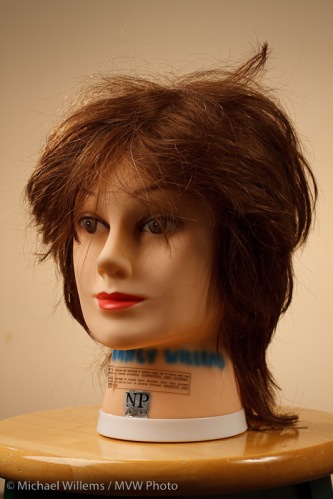
Rust:

Dark Salmon:

Medium Blue-Green:
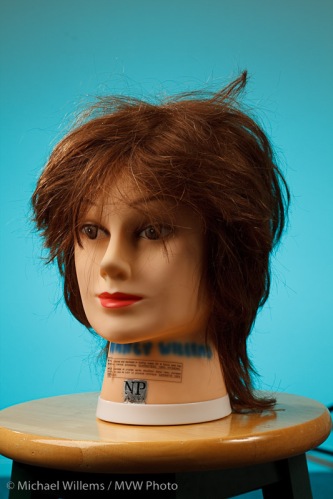
[2] The new “Hollywood”-kit:

Follies Pink

Steel Green:

Rose Purple:
Smokey Pink:

Pale Lavender:

And for comparison, some basic primary colours: Red, Green, Blue and Yellow:

And finally, what it looked like with no background light, white background light, and “heavy frost” background light:

Note: When you play with gels, do not forget to set your white balance to “F;ash”, so your canera does not try to adjust the colour away.

Now to see these colours side by side, check them on one page: http://www.mvwphoto.com/gels/

Fluorescent

A word about shooting in fluorescent light.

Unlike Tungsten light, which stays on and glows in between cycles, Fluorescent flashes on and off 60 times a second or more.

This means two things to photographers:

  1. Light may vary during a cycle
  2. If the flashes are short, your shutter needs to be all open when they occur. Meaning you need to stay well below your flash sync speed.

The second is most obvious.

Look at these images, shot at 1/320th second just now:

See what’s happening? They vary and from top to bottom the brightness is different in both. This is because the (vertical!) shutter is not all open when the brief flash happens.

So when shooting fluorescent,

  • stay well below the sync speed
  • if possible, stay at a discrete multiple of the light flash frequency.

If you do not know what “discrete multiple” means (how would you – you’re not an engineer!) then just stay at 1/30th second (and often 1/60th will work as well). and you are safe in both cases!

Shooting hockey? Well then just shoot a lot, and you’ll get lucky for some images. ortunately, hockye lights flash at a higher frequency, so the problem is much less common.